
My Ultimate Sony FX3 Rig Setup: Compact Power for Cinematic Filmmaking
If you’re looking to build a Sony FX3 rig that’s compact, professional, and fast to operate, this guide covers every component I use — refined over ten years of filming corporate, commercial, and cinematic projects.
Whether you’re shooting handheld, locked on a tripod, or mounted to a gimbal, this setup focuses on speed, power, and versatility, all running from one single V-Mount battery.
⚙️ The Core of My FX3 Rig
The foundation of any good camera rig is stability and adaptability. I want something that changes configuration fast — no tools, no downtime.
Here’s the full list of what I use:
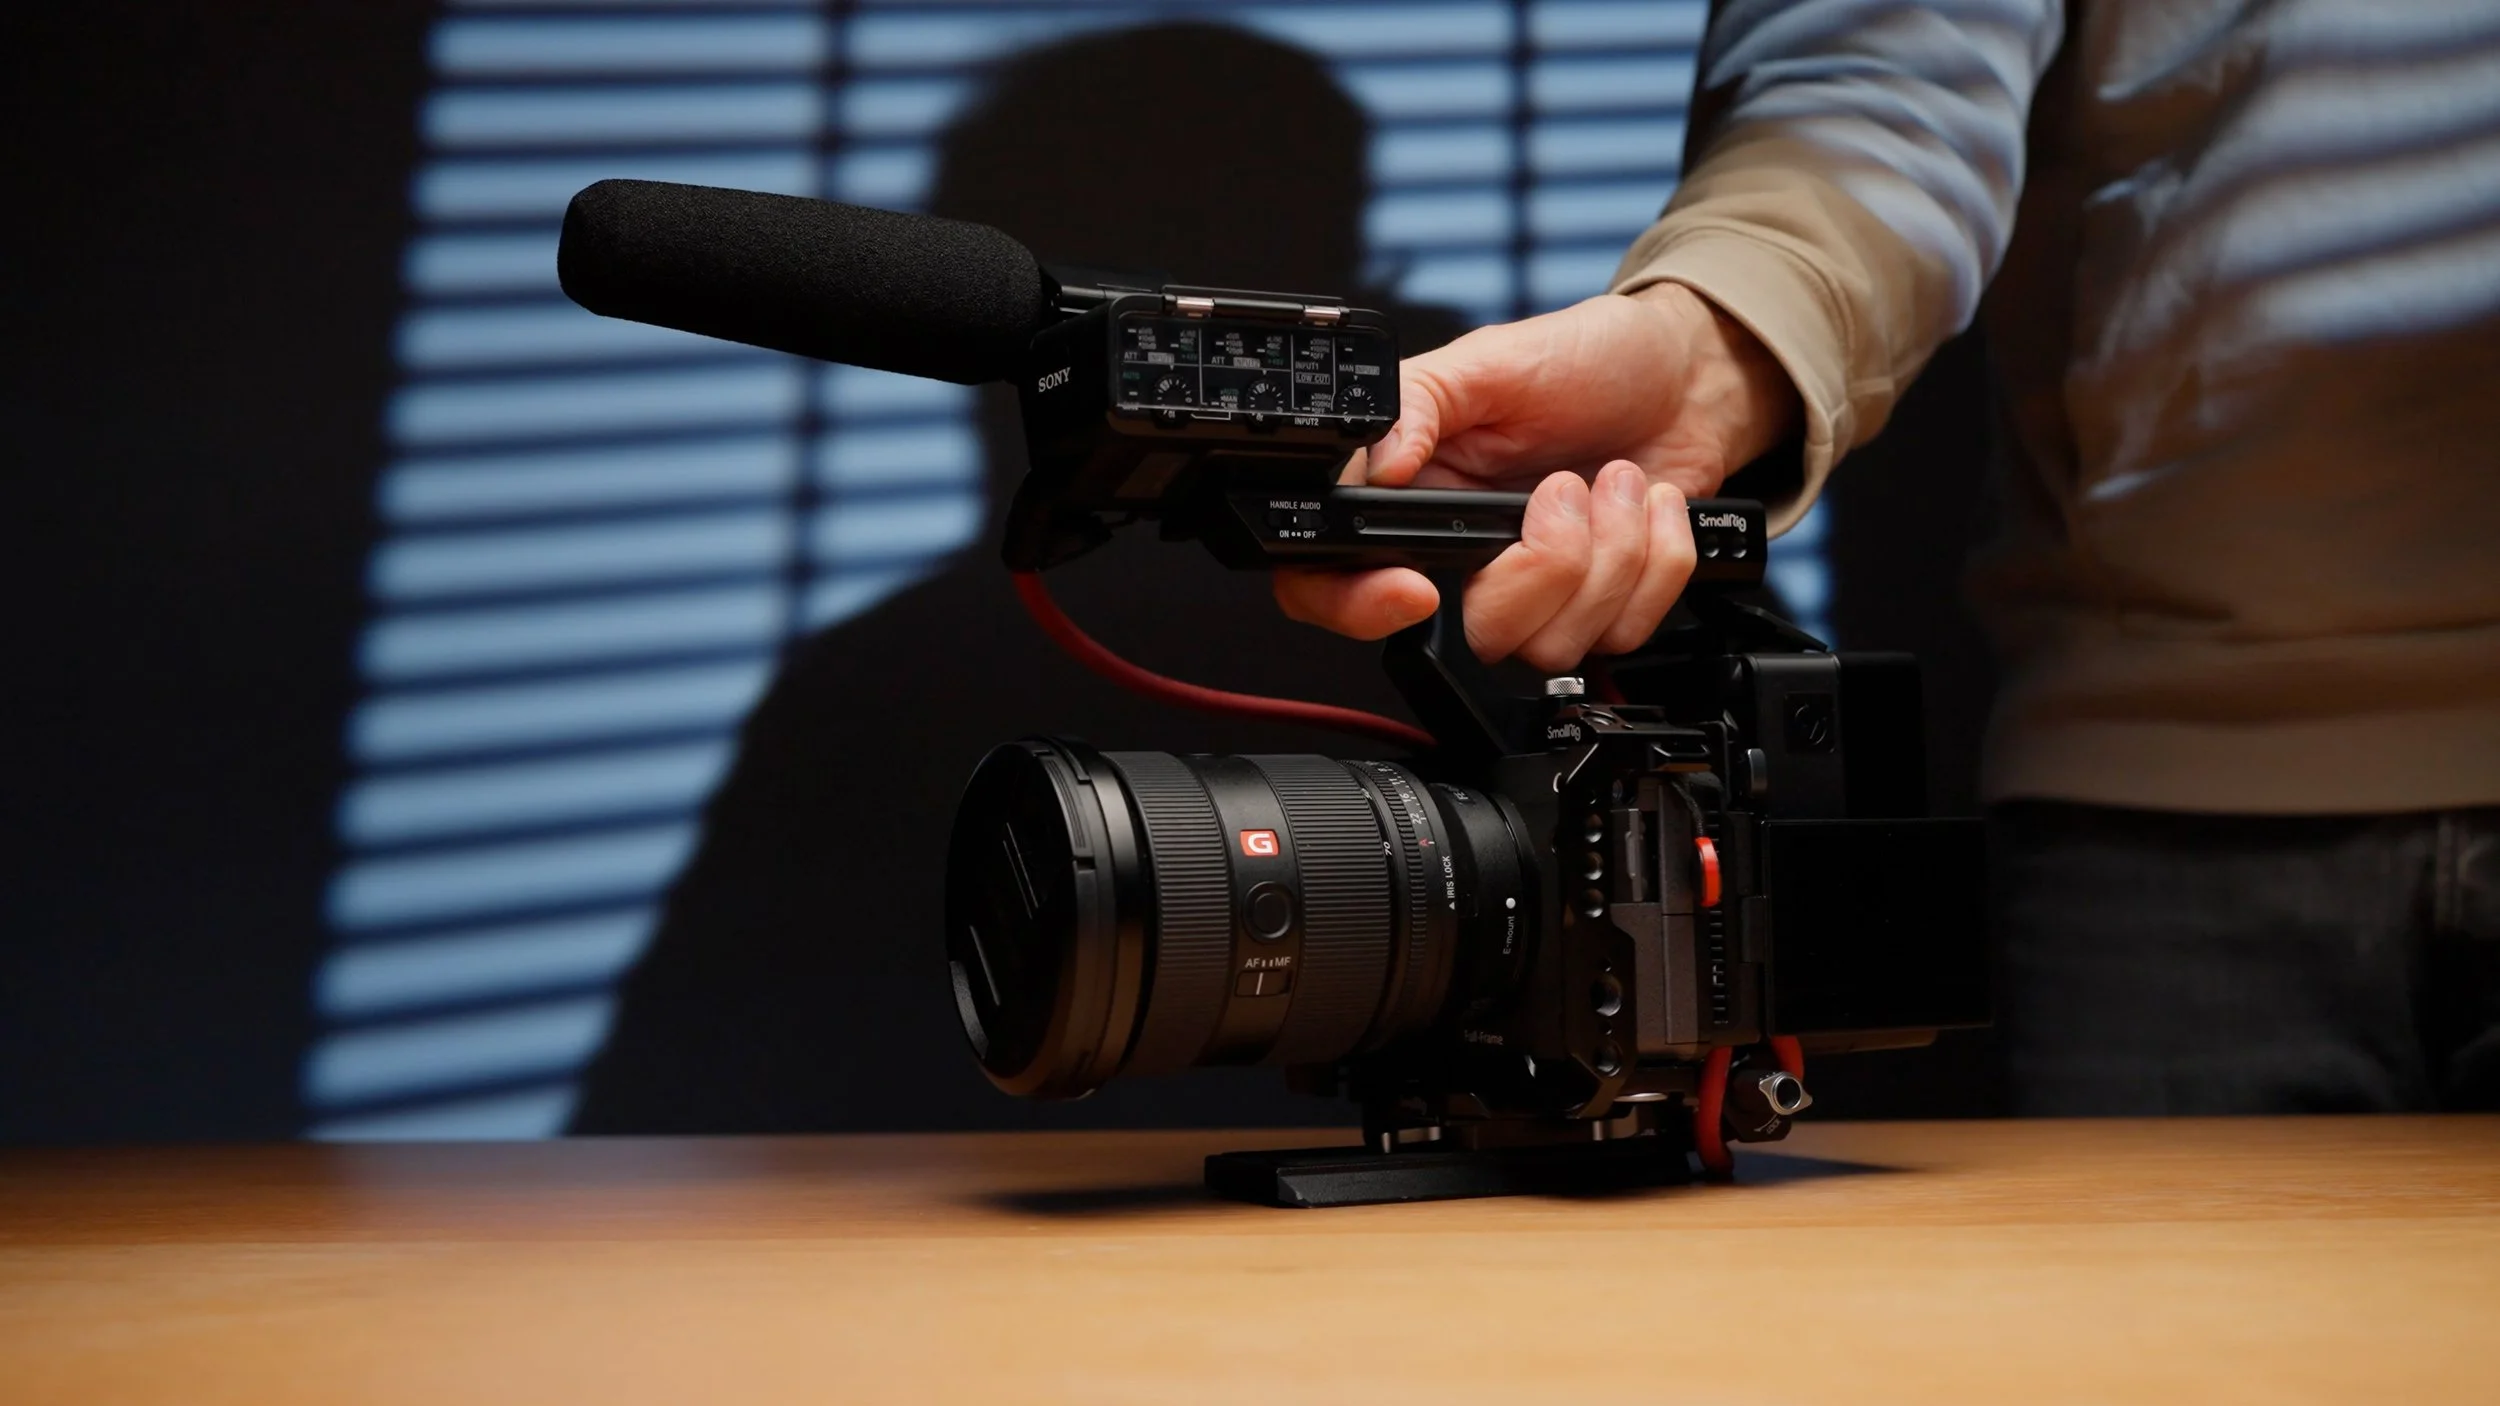
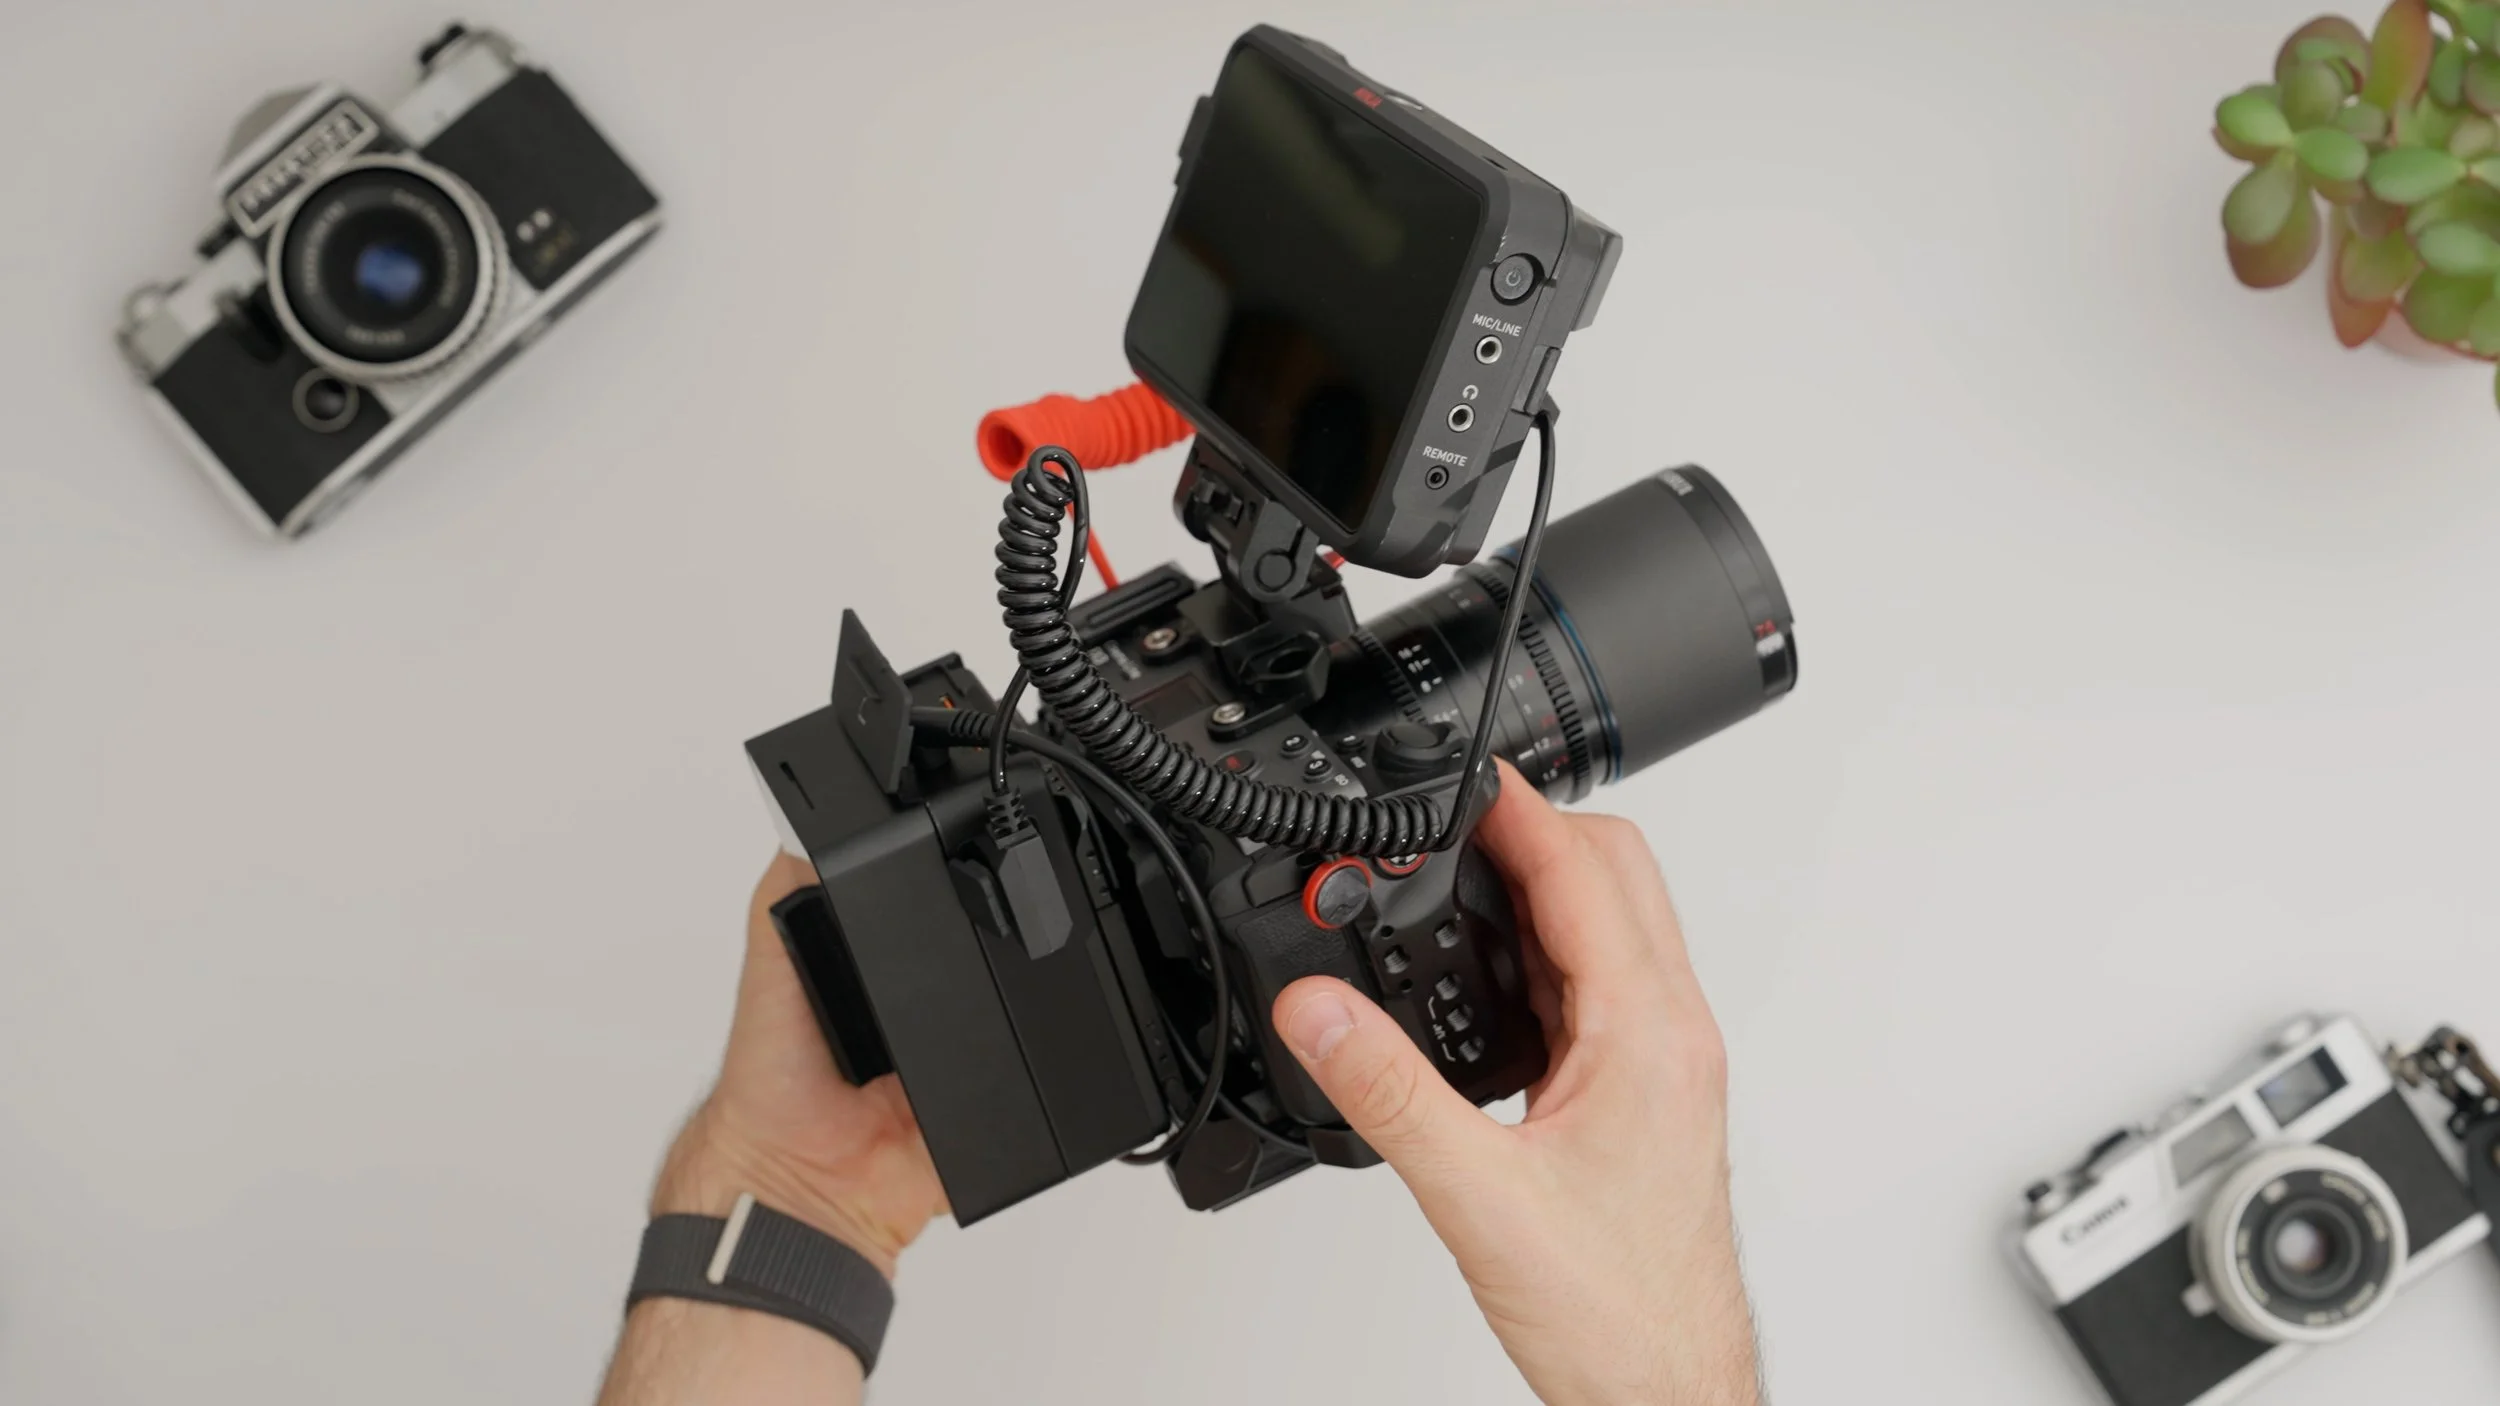
Camera Cage — SmallRig Quick Release Camera Cage Kit for the Sony FX3. Sturdy, ergonomic, and compatible with the original XLR handle. The Arca-Swiss base lets you mount or remove the rig instantly.
V-Mount Battery Plate — L-Shape Battery Plate with side latch for quick camera removal.
Main V-Mount Battery — SmallRig Mini V-Mount battery with D-Tap and barrel jack ports, compact yet powerful.
Dummy Battery — Connects directly to the V-Mount plate for continuous power during long shoots.
All the cables route neatly between the cage and plate for a clean, balanced setup.
🖥️ Monitor and Mounting System
For monitoring, I rely on the Atomos Ninja V — lightweight and full of professional exposure tools.
SMALLRIG DSLR Monitor Holder Mount — A friction-based NATO mount for fast, one-handed tilt adjustment.
Top NATO Rail — Ideal for quick swaps between a monitor and handle.
D-Tap to Power Cable Compatible with Atomos Ninja V — Powers the monitor directly from the main battery.
HDMI Coiled Cable — Keeps the connection tidy and flexible.
This combination allows real-time monitoring without unnecessary bulk.
📱 Monitor & CRT App: A Smart Alternative
When I’m on a commercial shoot and want an external display, I often use the Monitor & CRT app.
It connects to the Sony FX3 via Bluetooth, takes just seconds to set up, and works on iPhone or iPad. It’s a great way to share live angles with clients on set and costs a fraction of a dedicated monitor-receiver kit.
🎙️ Professional Audio Setup

For audio, I use the Audio-Technica AT875R Microphone — a compact shotgun mic that connects straight into the FX3’s XLR handle.
Its directional pickup pattern keeps the dialogue crisp and isolated, and you can adjust the angle depending on your sound source.
🎥 Lens Kit for the FX3
As a solo shooter, portability matters. These lenses cover 95% of my work:
Sony FE 24-70 mm F2.8 GM II — My go-to lens for interviews, A-roll, and cinematic footage.
Sony 35 mm F1.8 — Perfect for handheld or low-light scenes.
Laowa 10 mm F2.8 AF — Ultra-wide and great for social or vertical content.
For exposure control, I use the PolarPro Vario VND 82 mm ND Filter — wide enough for the 24-70 mm and essential for shooting outdoors.
🎬 Gimbal Integration
For motion work, I trust the DJI RS3 Gimbal — fast to set up, compact, and perfectly balanced for the FX3.
The newer RS4 and RS4 Pro are fantastic too.
Thanks to the quick-release cage, I can move from tripod to gimbal in just a few minutes — no re-balancing nightmare.
💡 Why This Rig Setup Works
Some might call rigs like this overkill. But when you’re filming multi-hour corporate interviews or creative shoots, power reliability and speed are everything.
Running your entire setup from one V-Mount battery means no interruptions, fewer cables, and smoother production days. Every component serves a purpose — from stability to clean power delivery.
✅ Final Thoughts
This Sony FX3 rig setup balances portability, power, and practicality.
Whether you’re shooting run-and-gun content or long-form interviews, this setup lets you focus on creativity instead of cable management.
👉 Recreate this rig here: